
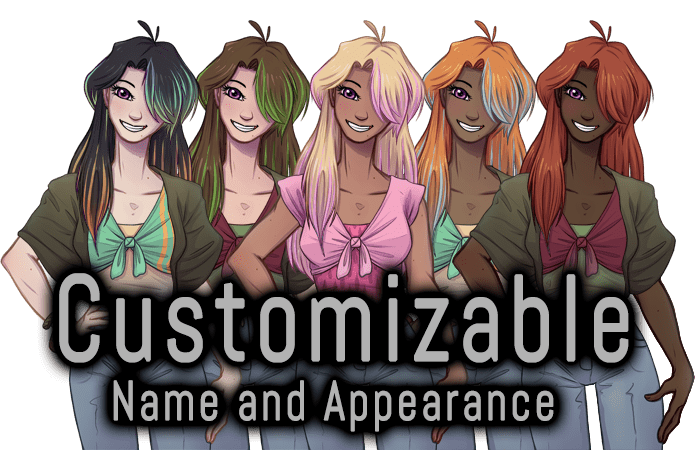
One of the parts of Pinewood Island and As We Know It that I am very proud of are the protagonists that the characters can customize. I’ve seen a few other visual novels do this, and I think it’s great! If you’re reading this you would probably like to do it too, but aren’t sure how. First, let’s talk about the pros and cons of incorporating a customizable sprite into your game.
Pros:
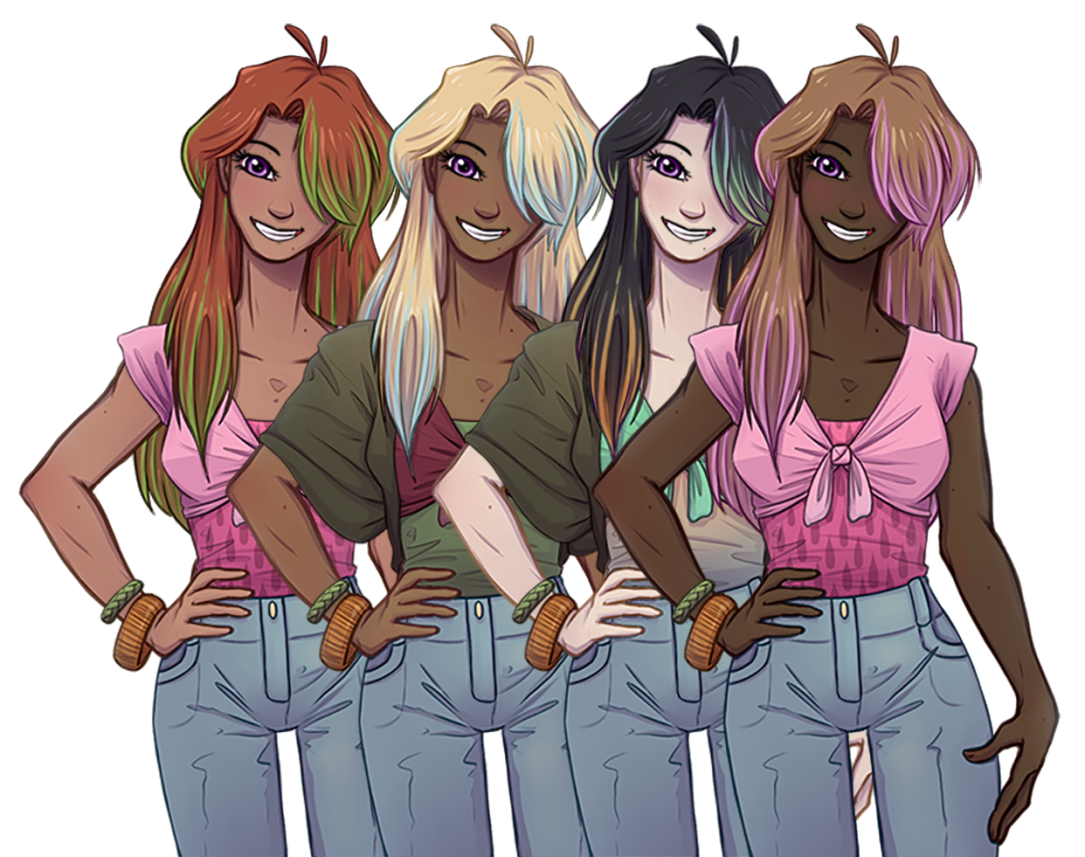
- Allows for your players to model the character after themselves. This is especially nice for POC since so many visual novel protagonists default to white/pale skin.
- Will make the player feel more attached to the main character. If the player has spent some time getting their character to look exactly how they want, it’ll help them build a connection to the protagonist because it is ‘their’ protagonist.
- It’s fun. A lot of players really enjoy the ‘dress-up’ aspect, they get to play around with the different options and it can just be a nice feature to add.
Cons:
- It costs more. You’ll be spending more money on art assets, and more time programming. This is especially hard if you plan to feature them in any CG/Illustrations in the game. It means that the artist has to draw several layers whenever the protagonist is featured. Then you have to program that all in. (I’ll discuss how to do this in this tutorial though!)
- Promotional material will be tricky. I get around this by only featuring the other characters. If you ever do showcase the protagonist players will likely consider that version ‘canon’ and it can deter them from changing it.
- Some players prefer to have a fully fleshed out protagonist and really don’t like ‘blank slates’. Even if your customizable protagonist has a determined personality it will still conflict with this mindset.
- On the flip side if players spend a lot of time making their own character, and then if that character acts in a way that they don’t agree with it can be very upsetting. This seems to be more prevalent in RPG/MMORPG games but it is a concern I have read about so it might be good to keep it in mind.
So now you’ve considered your options, looked at your budget, and you’re ready to do it! So let’s get into the actual tutorial.
The Art
The first thing you’ll need is the character sprite. If you’re an artist, that’s just a matter of you drawing it. If you’re not you’ll need to contact an artist and pay them for the sprite! The sprites from Pinewood Island were done by the super talented Johan Faulstich. If you’re working with an artist make sure you communicate that you’ll need the final, layered image! This is important for programming purposes. I use Photoshop CC, but I believe GIMP, or SAI might be comparable. This is what you’ll want:
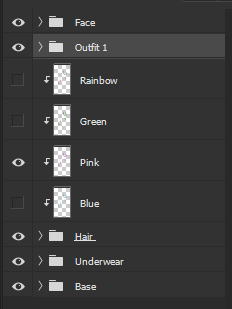
Each of those folders contain the different aspects that make up Delilah. For example the base folder contains each possible skin option.
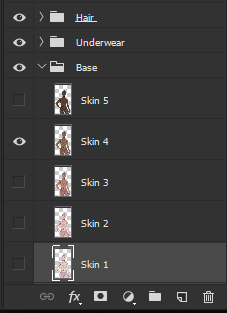
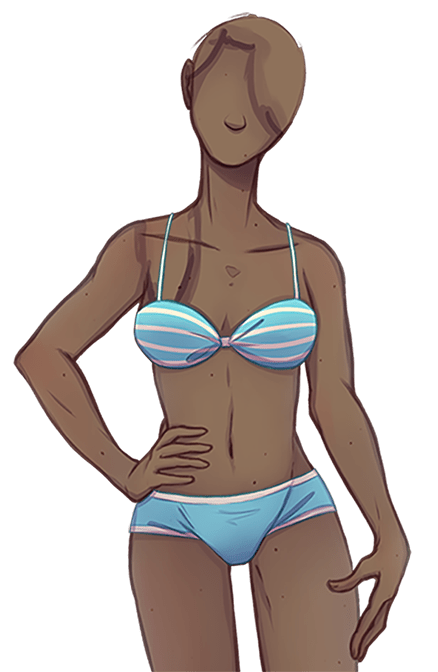
This is very important! You’ll need these so that you can layer them into the game easily. They should be exactly the same, but colored differently, so that they will layer with all of the other options seamlessly. Here is an example of just the base (including an underwear layer for modesty):
For anything you want the player to be able to customize you’ll need separate layers to do so. Once you have these you’ll want to export each individual layer into renpy. To do this you’ll need to open the images file in your game and export PNG images in the size that you want.
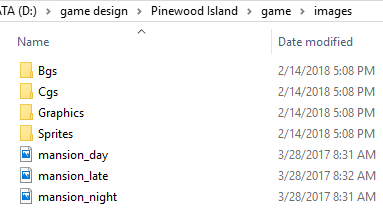
It’s also important to organize your folder, this is roughly how I had mine set up for Pinewood Island. You will also need to know these folder names for the image code in renpy.
So Delilah’s sprite folder looked like this:
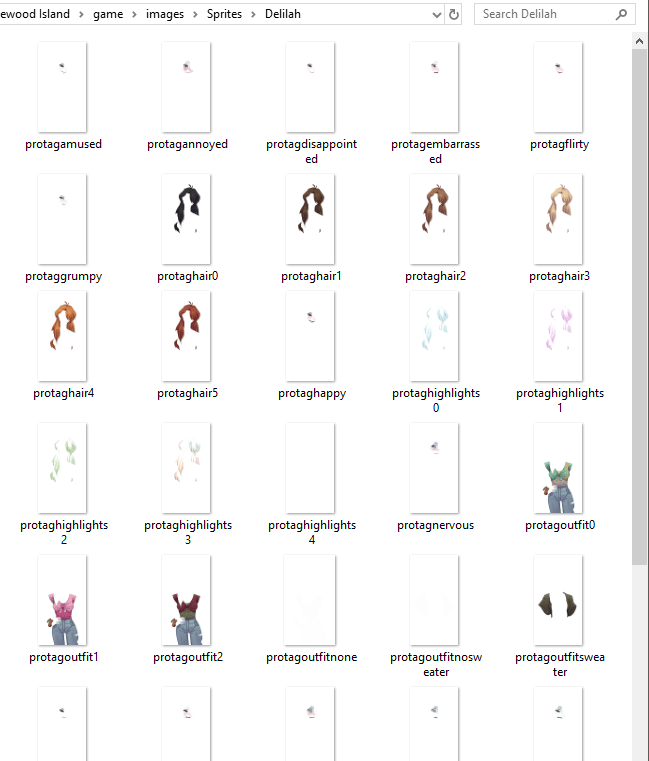
Obviously I can’t show the entire folder, because there were just so many options! But as you can see each version of every outfit, skin color, hair color, and highlights were each separately exported in. Make sure they are all sized perfectly, or you’ll get some weird glitches in your game! Also pay extra attention to how you name the files, that’ll be important later.
The Code
Now for the actual renpy code! For this I’ll show you the newer LayeredImage. For Pinewood Island and As We Know It I used the old method of ConditionSwitch and LiveComposite. LayeredImage is much nicer to work with so I highly recommend it! I’ll be using it for all future sprites. If you need a tutorial specifically on Layered Image then I highly recommend this (FREE) download on itch.io!I learned a lot of the newer techniques from this tutorial and it’s a good source of information.
This is how you’ll want to define the image:

The reason why there are ‘default’ options is so that the game doesn’t freak out when you get to the dollmaker screen, and so that there will be some kind of image present. Let me break down the above code with a few important things.
First, you’ll notice this is a very trimmed down version of Delilah from the game. This is because she was originally coded the old way, and I’m just doing this new way for the tutorial.
The next thing I want you to notice is the order which I’ve layered the image. If you get the order wrong the sprite will look….. odd. You want to think top down. This may be different for you. Don’t be afraid to change the order if things look weird.
With this code Delilah looks like this at the start of the game:

So you have a sprite that you can now customize!
Now you need to allow the player to customize them! A good way to do this is by creating a screen that will allow the player to change the variables. Renpy screens can be a bit tricky, so I strongly suggest getting familiar with Renpy’s documentation. If you have problems you can always ask questions on the Lemmasoft forum.
Quick disclaimer, I am not a professional programmer. I’m self taught, and honestly there might be more efficient ways to do what I do! So don’t be afraid to reach out to other people if you have problems.
On with the code!
You’ll want to create a dollmaker screen. This will be what you call when you want the player to change the character. For the tutorial this screen will be quick and ugly. I’ll try to break it down so that you can take the code and customize it to fit your needs.
Here is an overall shot of the code. I’ll break it down next!
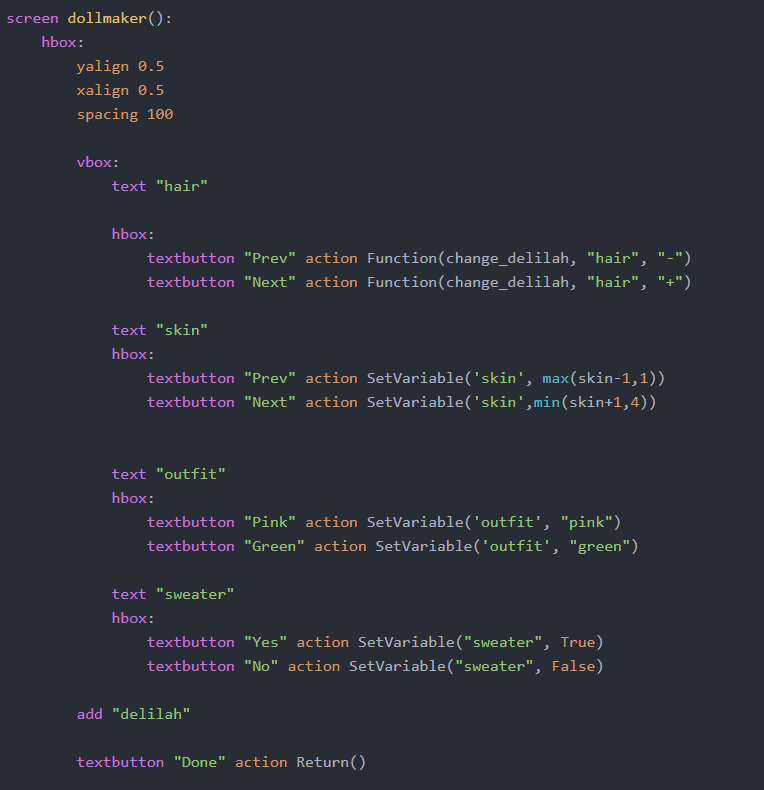
hbox puts all of the elements within it into a horizontal box
vbox puts all of the elements within it into a vertical box
xalign, yalign, and spacing just made the screen appear at the center of the screen, and add a bit of padding between the buttons and the image of Delilah.
The “Done” button tells the screen that you are done and it can go away now. If you don’t have this the screen will stay there, and you don’t want that!
This is what the above code looks like inside of renpy:
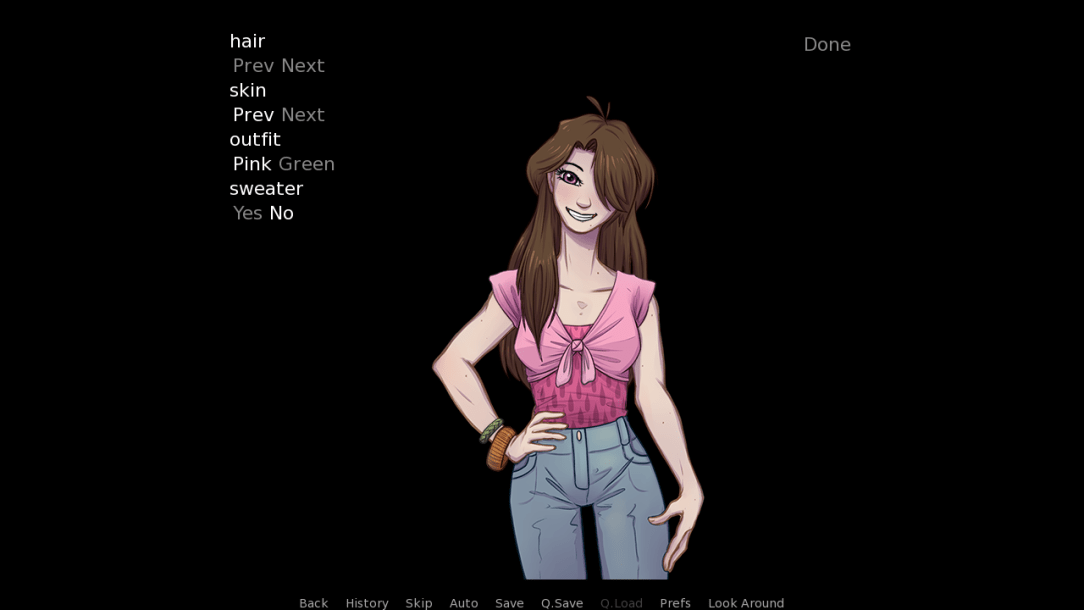
Like I said, quick and ugly!
In the code you’ll see I did every option a different way. This is to help you see that there are lots of ways to accomplish what you want, based on the amount or variables and the type of screen you’re working with. I’ll go through and explain each section now.

This is the way I like best, because it’s smoother. The function manages the amounts and can be used for all options. It does require writing a function, but I’ll go into that at the end.

This one directly changes the variable, and requires the max/min function to keep the values in check. That way you don’t define your variable into an amount that doesn’t exist! In this case there are only 3 possible options so you want to keep the numbers between 1-3.

This is what happens when you don’t use the min/max properly!! Oh no!

This third option could be nice if you wanted several buttons to showcase each option. In this case you can change the variable with a string. It still uses SetVariable, and would require a button for each option.

The fourth way also uses SetVariable but works with True/False values. This is good for options like the sweater which you either want on the sprite or you don’t.
Back to the first option I mentioned!

This option uses the screen function Function. Function(function name, parameters). It requires that you write a function which is easier than you might think! Here is the function this references:
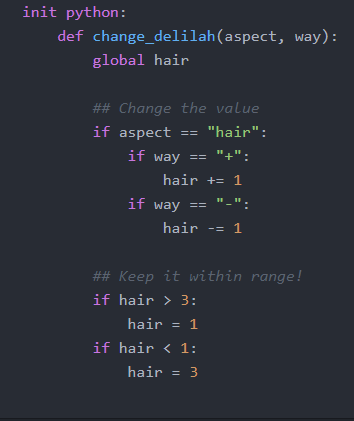
you have to make sure functions are defined under init python!
def change_delilah is telling renpy that you are defining a function named ‘change_delilah’.
All functions need to be followed by ( )’s even if it’s empty.
The ( )’s contain any parameters which help tell the function what to do.
In the above example ‘aspect’ refers to which part of Delilah we want to change. I could then go on to have this function work for outfit, skin, and so on. the second parameter is ‘way’ and tells it where I want it to go forward or backward. Below are if statements which should be fairly simple to understand!
the line that reads ‘global hair’ tells the function that the variable ‘hair’ exists outside of the function and that it should be changing it!
Now you have your screen, so all you need to do is call it when it’s time to let the player mess with the character! In the script just write: call screen dollmaker
Super easy! Now for the more complicated part ^^;
The CGs
If you want a customizable character AND CG illustrations in your game you have a few options.
- Never feature the protagonist in any of the CGs.
- Pick a ‘canon’ version of the character to show each time – though this may upset the player.
- Have customizable CGs! The more complicated and expensive option.
If you want to choose option 3 then I can at least help you a bit with the code! First let’s discuss the artwork.
You’ll need to layer it in a similar way to the sprite. If you go this route I strongly advise that you only allow the player to adjust the coloring of things. If you also let them adjust something such as ‘hairstyles’ remember you’ll need to have several different versions of each CG!
Once you have the art you’ll want to layer it within the code:
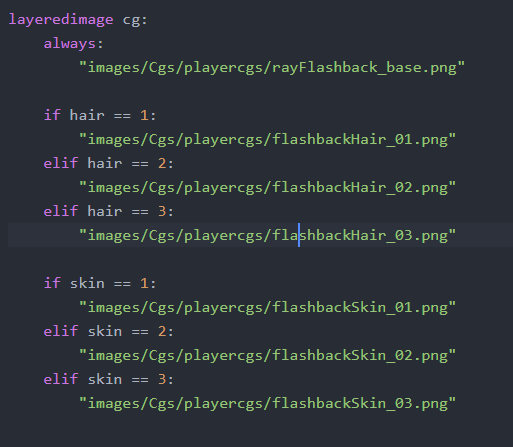
As you can see for these I use layered image again! Of course in the original game I used LiveComposite, but Layered image works well for this too. So you have the CG, and it reflects the character’s sprite! That’s great!
Oh, but the CG Gallery….
If the player goes through multiple routes, each with a unique character, they’ll want the CG gallery to reflect that! This is where it gets a bit tricky. I recommend using persistent variables to accomplish this.
So when you call the CG during play you’ll want to do something like this:
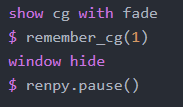
$ remember_cg(1) is another function! Yay! Using a function when you call the CG will make it remember what the character looked like for the gallery. Let’s look at the function:
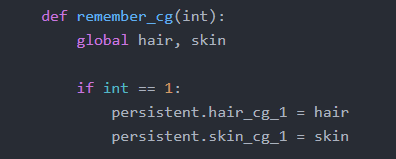
Remember when creating a function to write them below init python!
This function can handle several CGs, which is why I use the number 1. In the above code I tell the function that the parameter is 1, and then the function knows which code to apply. That way you only need a single function for all of your CGs!
‘persistent.hair_cg_1’ is the variable that will control the hair color of the protagonist in the CG gallery. If you have a different persistent variable for each CG then you can maintain the value throughout multiple play throughs.
Then when it comes time for the CG in the gallery you’ll want to layer the image something like this:
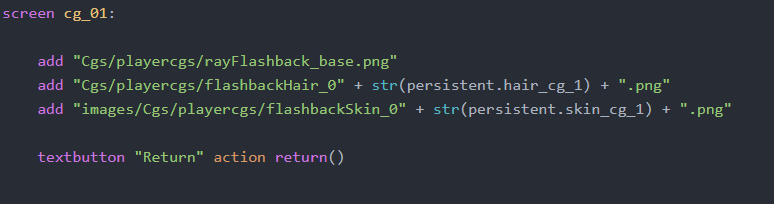
Then it’s important to name your files to match the persistent values. so that for hair color the files would be named “flashbackHair_01.png” and so on for each value.
str() is a function that converts values into strings, and is very useful for this example.
Then you’re done!
A couple of notes:
- Do not copy/paste the code I wrote into your game! You’ll need to write it to reflect your own variables/files and so on. Writing it yourself might also help you learn it better, anyway!
- If you really struggle with code I recommend the free python course at Code Academy. That’ll help you learn the basics, the jargon, and you may come up with better ways to do what I’ve done above!
- Always run/test your code often as you write it. That way if something goes wrong you’re more likely to catch the right thing.
- Don’t be afraid to ask for help, a lot of this code I got from other tutorials or people helping me.
- These methods work right now, but Renpy is always changing. A few years from now there might be a different or better way so if you’re reading this beyond 2019 keep in mind the code may no longer work.
- The best way to learn Renpy is to familiarize yourself with programming jargon, and reading the documentation.
Thank you for reading! I hope this helped someone. I might try to do more tutorials in the future.
